
Arduino is an open-source electronics platform designed to make learning and creating with electronics easy and fun. It combines a small circuit board (a microcontroller) with an easy programming environment. The boards can read sensors (like temperature or light sensors) and drive actuators (like LEDs, motors or displays), enabling you to build gadgets and simple “smart” devices. Thanks to its user-friendly hardware and software, Arduino has “revolutionised electronics by making it accessible to everyone, from hobbyists to professionals… bridging the gap between creativity and technology”, The huge Arduino community shares tutorials and project ideas, so you’re never alone in learning how to turn your ideas into real-world projects.

Figure: An Arduino Uno R3 board (top view). The microcontroller chip (ATmega328P) sits in the middle, and digital/analog pins surround the board. Arduino boards include USB and power connectors so you can easily upload code and power your project.
Official Arduino Boards
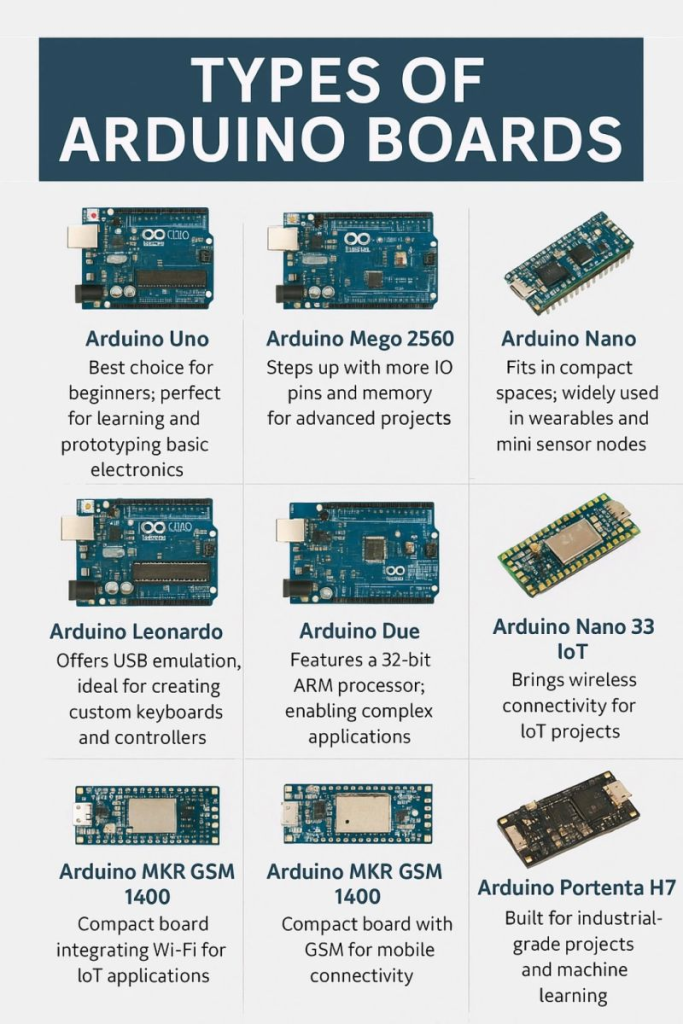
Arduino offers several official boards, each with different sizes and capabilities. Some of the most popular are:
Arduino Uno – Often recommended for beginners. It uses an 8-bit ATmega328P microcontroller running at 16 MHz. It has 14 digital I/O pins (6 of which can do PWM) and 6 analog inputs. It comes with 32 KB of flash memory (for your program), 2 KB SRAM, and 1 KB EEPROM. The Uno has a USB-B port for programming and a barrel jack for external power. It’s a 5V board (operating voltage) and is very well documented, making it a robust starting point.
Arduino Mega 2560 – A larger board for bigger projects. It uses the 8-bit ATmega2560 chip. The Mega has a huge number of I/O pins: 54 digital pins (15 PWM) and 16 analog inputs. It also provides 256 KB flash memory (8 KB used by bootloader), 8 KB SRAM, and 4 KB EEPROM. Like the Uno, it runs at 5V and has a 16 MHz clock. Because of its many pins and extra serial ports, the Mega is ideal for projects needing lots of sensors, motors or displays.
Arduino Nano – A tiny, breadboard-friendly version of the Uno. It uses the ATmega328 (similar to Uno) but in a smaller DIP package. It has 22 I/O pins (7 PWM), 8 analog inputs, and the same memory (32 KB flash, 2 KB SRAM) as the Uno. Unlike the Uno, the Nano has no DC jack and instead uses a Mini-USB connector for power/programming. Because of its small form factor (about 18×45 mm), the Nano is great for compact projects and breadboard prototyping.
Arduino Leonardo – Uses the ATmega32U4 microcontroller, which has built-in USB capability. This allows the Leonardo to act as a USB device (like a mouse or keyboard) without extra hardware. It runs at 16 MHz and 5V. The Leonardo provides 20 digital I/O pins (7 with PWM) and 12 analog inputs. It has 32 KB flash, 2.5 KB SRAM, 1 KB EEPROM. Because of the USB-native chip, the Leonardo can emulate a keyboard or mouse when connected to a PC. Its size is similar to the Uno, but its USB port is Micro-USB instead of full-size USB.
Arduino Due – A powerful 32-bit board based on an ARM Cortex-M3 (the Atmel SAM3X8E) running at 84 MHz. Unlike the others, the Due operates at 3.3V. It has 54 digital I/O pins (12 with PWM) and 12 analog inputs, plus 2 analog outputs (DACs). It also includes 4 hardware UARTs and native USB OTG. The Due has much more processing power and memory than the 8-bit boards (not specified on site, but it is a 32-bit MCU). Because of this, it’s suited for advanced projects (real-time processing, multi-tasking, fast I/O). One must be careful: its I/O is not 5V tolerant, and it comes with a warning not to exceed 3.3V on its pins.
Aside from these, Arduino has many other official boards (Nano families, MKR series, etc. – see Arduino’s website), but the ones above cover the core families. Each board has different numbers of pins, memory size, and power options, so you choose one that fits your project. For example, if you need compact size, use a Nano; if you need lots of pins or memory, use a Mega; if you need USB HID capability, use a Leonardo; if you need speed or 3.3V I/O, use a Due.
Third-Party and Compatible Boards

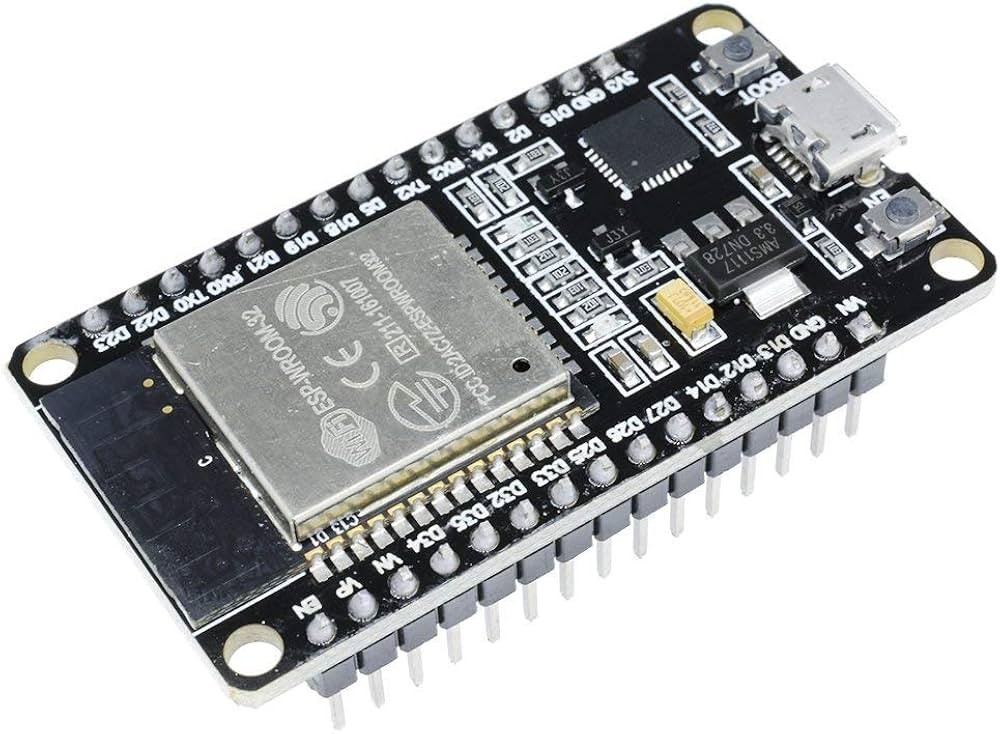
Because Arduino designs are open, many other manufacturers make Arduino-compatible boards or “clones”. These are often cheaper or come with extra features. Examples include boards based on the ESP8266/ESP32 (which have Wi-Fi/Bluetooth built-in) or the Teensy boards (small form factor with powerful ARM chips). These clones use the Arduino bootloader and can be programmed with the same Arduino IDE. In practice, an Arduino-compatible board works like an official one in software, but might use a different USB chip (e.g. CH340) or have slight pin differences. Using an Arduino clone “is by no means illegitimate. Instead, it’s simply third-party” hardware. Many clones offer additional hardware: for instance, some come with built-in wireless radios, extra memory, or battery charging circuits. When using a third-party board, just ensure it’s listed in the Arduino board manager or available libraries, and check its operating voltage (3.3V vs 5V) and pin layout.
Arduino Shields
Shields are plug-in add-on boards that stack on top of an Arduino to extend its capabilities. They are “plug-and-play” modules that can handle tasks like motor control, wireless communication, or driving sensors. Some common shields include:
Motor Driver Shield (e.g. Motor Shield Rev3) – Provides one or two H-bridge motor drivers (usually based on an L298 or similar chip). You plug it on top of an Arduino Uno or Mega, and it lets you easily drive DC motors, stepper motors, or even relays. For example, the official Motor Shield Rev3 uses dual L298 bridges, letting you drive inductive loads (motors or solenoids) up to a few amperes. The shield handles the heavy current so the Arduino pins don’t burn out.
Ethernet Shield – Adds wired network connectivity via an RJ-45 jack. Plug the Arduino Ethernet Shield onto an Arduino Uno or Mega, and connect it to your router. It includes an Ethernet controller chip (e.g. W5500) and can make the Arduino appear on your local network. With this shield, you can serve web pages or send data over TCP/UDP easily. The official Ethernet Shield 2, for example, “connects your Arduino to the internet in mere minutes: just plug onto your Arduino and connect an RJ45 cable”. It includes a microSD card slot as well for data logging.
Wi-Fi Shield – Gives wireless networking. (Arduino used to sell a WiFi Shield and newer boards like Uno R4 and MKR1010 have built-in Wi-Fi.) A Wi-Fi shield typically uses a Wi-Fi chip (such as an ESP8266 or u-blox module). It lets the Arduino connect to home/office Wi-Fi, so your project can send or receive data over the Internet without wires. (Nowadays, many people use small ESP8266 or ESP32 boards instead of a separate shield.)
Relay Shield – Provides one or more relays (electromechanical switches) that the Arduino can control. Each relay can switch high-voltage/current loads (like AC lamps or motors) on and off safely. For example, a 4-channel relay shield has four relays rated for mains voltage. The Arduino’s digital pins activate the relays, which in turn switch external loads. This lets your Arduino control lights, fans or appliances. (As a note: relays are typically used in industrial and home automation to “control high power circuits”, though you should always follow safety guidelines.)
LCD Shield (Display Shield) – Contains a character or graphical LCD screen (and often buttons). It plugs on top of the Arduino and gives you a built-in display, saving you from wiring an LCD separately. For example, a common 16×2 LCD shield lets you easily print text or simple graphics. Some shields even have color LCDs with touch input. These are handy for creating interfaces or showing sensor readings without adding lots of wiring.
Other Shields – There are many other shields: for example, a “Sensor Shield” (breakouts for many sensor inputs), “MP3 Shield” (to play audio), “Camera Shield”, GSM/3G shields (to connect to cellular networks), GPS shields, and many more. In general, a shield simplifies adding complex hardware: the shield is designed to fit the Arduino pin layout, so you just stack it on top and write your code to use its features. As RobotShop puts it, Arduino shields “offer versatile ways to extend functionality… from motor control and Wi-Fi connectivity to relays and data logging”. This means you can add wireless radios, network ports, or special sensors without designing new circuits yourself.
Sensors and Modules for Arduino
One of the strengths of Arduino is its ecosystem of sensors and modules that you can easily hook up. Here are some popular ones:
Temperature & Humidity Sensors (e.g. DHT11, DHT22, LM35) – These modules measure ambient temperature (and often humidity). You can use them to build a digital thermometer, weather station or climate controller. They typically communicate over simple digital or analog interfaces.
Infrared (IR) Sensors – These come in two main types: IR receiver modules (to read remote control signals) and IR proximity sensors. IR proximity sensors emit IR light and detect reflections, useful for simple obstacle detection or line-following robots. IR receivers (with photodiodes) let your Arduino respond to TV remote controls.
Ultrasonic Distance Sensors (e.g. HC-SR04) – These sensors emit an ultrasonic sound pulse and measure how long it takes to bounce back, computing distance to an object. They are widely used for accurate distance measurement and obstacle detection in robotics. For example, using an HC-SR04 is common in student projects to avoid walls or measure water level.
Gas Sensors (MQ series, etc.) – Gas sensing modules detect gases like LPG, methane, carbon monoxide, or smoke. For example, the MQ-2 sensor can detect flammable gases and smoke, useful for safety alarms. They output an analog voltage proportional to the gas concentration. These are popular in home safety or environmental monitoring projects.
Passive Infrared (PIR) Motion Sensors – These sense infrared radiation changes caused by motion (e.g. a person moving). They are used in security alarms or lights that turn on when someone is near. A PIR outputs a simple signal when motion is detected.
Light Sensors (LDR/Photocell) – A Light-Dependent Resistor changes resistance based on light. You can use it to detect day/night or light levels. Common projects include automatic night lights or light meters.
Sound Sensors (microphone modules) – These detect sound levels. They’re often small microphones with signal conditioning. You can use them for clap switches, noise meters, or voice-activated projects.
Soil Moisture Sensors – Two-prong sensors that measure soil water content. Great for automated plant watering systems; they give an analog reading that rises when the soil is wet.
Accelerometers/Gyros (e.g. ADXL345, MPU6050) – These modules measure acceleration/tilt (accelerometers) and often rotation (gyros). They’re used in robotics, drones, or wearable electronics to sense orientation and motion.
Humidity Sensors (DHT11/DHT22) – Often bundled with temperature measurement (see above). Used in weather stations, refrigerators, terrariums, etc.
Gas Sensors (MQ series) – Detect gases like smoke, LPG, CO, useful for safety projects.
RFID Modules (e.g. RC522) – RFID (Radio-Frequency Identification) modules let the Arduino read RFID tags (card or keyfob IDs). You can build door locks or ID badges: the module reads the tag’s ID and sends it to the Arduino over SPI.
Bluetooth Modules (e.g. HC-05, HC-06) – Small serial adapters that add Bluetooth wireless to your Arduino. They communicate at TTL serial and let you send data to/from a phone or PC wirelessly (up to ~10 meters). For example, you could send sensor readings to a smartphone.
GSM/GPRS Modules (e.g. SIM800L) – These modules use cellular networks. By connecting a SIM card, your Arduino can send/receive SMS messages or use Internet (GPRS). Useful for remote monitoring or alert systems where Wi-Fi is not available.
GPS Modules (e.g. NEO-6M) – GPS receiver modules give your Arduino its geographic location (latitude/longitude) and time from satellites. They output data over serial. You can log position data or make location-aware projects (like a tracker or speedometer).
These sensors and modules usually connect via digital I/O (including I2C or SPI), analog inputs, or UART. They dramatically expand what your Arduino can do: measure physical quantities, communicate, and interact with the world in many ways.
Applications of Arduino
Because of its flexibility, Arduino is used in almost every area of electronics and embedded projects:
Robotics – Arduino boards are a natural fit for hobby and educational robots. You can control motors, read sensors (distance, light, etc.), and implement behaviors. For example, many line-follower robots, small drones, and robotic arms are Arduino-powered. As the Wikipedia notes, “common examples” include simple robots and motion detectors.
Home Automation and IoT (Internet of Things) – Arduino (often with Wi-Fi or Ethernet) is used to automate lights, fans, or home monitoring. You can build smart devices that read sensor data and control things via a network. The ease of connecting to the Internet (with shields or Wi-Fi boards) makes Arduino popular for IoT projects like weather stations, home security systems, or connected appliances.
Industrial/Automation Prototyping – Engineers use Arduino for prototyping control systems. For example, a PLC-like control, data loggers, or sensor networks can be built with Arduino during development or even for final use in small-scale applications.
Education – Arduino was originally created as an easy tool for students and designers to learn electronics and programming. Today it is widely used in schools and maker spaces. Its simplicity (plug components onto a breadboard, drag-and-drop libraries) helps beginners quickly build interactive projects, gaining confidence in electronics and coding.
Creative and Hobby Projects – Artists and hobbyists use Arduino in interactive installations, musical instruments, or DIY gadgets. For example, custom LED light patterns, digital art pieces, or wearable electronics (like costume lights or props) often use Arduino.
Science Projects and Research – Scientists use Arduino for data collection (environmental sensors, telescopes, etc.). Its low cost allows deployment of many units in experiments or prototypes (e.g., remote weather sensors, automated wildlife cameras, etc.).
In general, Arduino projects interact with the real world using sensors and actuators. As the Arduino founders envisioned, it provides a “low-cost and easy way for novices… to create devices that interact with their environment using sensors and actuators”. From blinking LEDs and reading temperature to controlling robots and connecting to the cloud, Arduino is a bridge between software ideas and physical systems.
Conclusion: Start Building with Arduino
Arduino is a friendly platform that turns ideas into reality. You’ve seen how even simple boards like the Uno or Nano can read inputs and control outputs to build useful gadgets. The ecosystem of shields, sensors, and modules means you can prototype almost anything—smart devices, robots, environmental monitors, and more. Best of all, it’s designed for learning: you can tinker without fear, and replace the board if you accidentally short it. There is a huge community of fellow learners sharing code and help.
If you’re a student or beginner engineer, the best way to learn is by doing. Pick an Arduino board (a starter kit with an Uno is great), connect an LED or sensor, and start writing code. Try a simple project like blinking an LED, then move to reading a temperature sensor or driving a motor. Each small success will teach you something new. Remember, Arduino was created to empower students and makers: it’s okay to experiment, make mistakes, and try again.
In short: let your curiosity lead you. Arduino makes it easy to prototype and play with electronics. So grab a board, plug in a sensor or two, and start building your ideas. You might be surprised how quickly you can bring a clever concept to life when Arduino is on your bench. With Arduino, you hold the key to a world of projects — now go innovate!